Showing posts with label Before and After. Show all posts

Wednesday, December 11, 2013

Shining Your Sink 101

When I did FlyLady's BabyStep #1 (written about in this post), and gave my sink the DEEP shine today, I snapped some pictures to share what the step-by-step process looks like.  So here's the new and improved steps to shining your sink!  And then I promise this will be the last I post about it... for a bit. :)

Have you shined your sink yet?  If not, jump in and do it today!  (Not gonna lie, it did take me all of Ellie's 2 hr. naptime, and beyond!  The dishes took some time to clean up, and then the hour long soak gets ya... So maybe an hour before you plan to work on it, have the bleach soaking already so you're ready to go!)

Okay, want to see my Before shot?


Time to take a deep breath, put on those cute cleaning gloves that make you smile, (and a cheesy Christmas movie on Netflix, like A Christmas Kiss), and dive in.

FlyLady's Shiny Sink 101:
(From www.flylay.net | FlyLady's words are purple; my words black)

Note: Be sure to rinse well between each step!

And remember, You only follow this procedure the first time you shine your sink. You do NOT need to follow this method every day. Just keep up the shine with a little window cleaner.


First, start by gathering your supplies: paper towels or rags, your sink plugs, bleach, tongs, 1 c. measuring cup, cleaning gloves (I like to have one pair for dishes and a separate pair for cleaning), a powder cleaner like Comet or Ajax, a sponge, toothbrush, butter knife, Windex--or your favorite countertop cleaner (I love Target's Caldrea line--check if your store carries it!), and finally, lemon Plinks (little scent balls for dish disposal--often found hanging in cleaning aisle of grocery stores).  Oh, and not pictured above but VERY important: a good hand lotion--cause oh boy can cleaning dry out those hands!  Here's my fave that you can find at Target.  It smells heavenly!   
Pink Innocencia Body Butter by Sonia Kashuk  |  $10.99 at Target
Step 1) Take all the dishes out of the sink. (I washed and put in dish washer.  This was probably the better chunk of the cleaning time come to think of it.  And side note, do you have gloves that make you smile?  I haven't always worn gloves to do dishes or clean, but it makes it more fun now that I have cute ones!)


2) Run some very hot water into the sink and fill it to the rim. If you have a two-sided sink, only do one side at a time. (I kind of have no idea why this is, but I followed FlyLady's directions.  Definitely took longer, but I was able to do subsequent steps on one side while the other side soaked.) Then, pour a cup of household bleach into the hot water. (I have a yucky cup that I use just for this reason.  It feels funny to me to use a cup I bake with for bleach.  Just me?)  Let it sit for one hour. Now, pull the plug with a pair of tongs. If you don’t have tongs, then scoop some of the water out of the sink into the other sink and use your hand to pull the plug. Make sure you wear gloves so the bleach doesn’t irritate your skin, and don’t get the bleach water on your clothes.


Step 3) Rinse your sink well. I scrubbed the residue well with the scratchy side of a sponge.

Step 4) Use some powdered cleanser (Comet, Ajax, or baking soda) and scrub your sink.


Before sprinkling the Comet, I splashed water around to dampen everything.  Then after sprinkling it all over I let it sit for 5 minutes.  This scrubbing here is what gives your sink its shine, so make sure you scrub really well.  And of course, be sure to rinse ALL of the cleanser from the sink.

Step 5) Take a sharp edge, such as a butter knife, and clean around the rim of the sink, just like you would clean dirt out from under your fingernails.  I found the butter knife worked great!  I've also seen my mom use a small spoon turned over to scrape off the gunk.  I mainly just scratched back and forth along the groove with the knife, because I noticed it could scratch the counter if I tried to go bigger than that.

Step 6) Clean around the faucets. You may need an old toothbrush or dental floss.  I didn't use the floss since the toothbrush did the truck.  I wonder how the floss would go over though!


Here is half of the scum behind the faucet scraped off!  Made such a difference in the overall look of the sink. 


Step 7) Now, get out your window cleaner; I use Windex. Give it a good shine.  I've liked this new scent by Windex in Lavender and Peach Blossom.  It still smells like a cleaner, but I feel like it's a bit more pleasant.  I just sprayed it all over and used a paper towel to buff it really well.  And then I stood back to admire the SPARKLE! :)


Windex® Multi-Surface with Glade® Lavender and Peach Blossom
K, now let's remind ourselves what my sink looked like BEFORE...


Aaaaaand, TA DA!!!!!!!!!!  My shiny sink!!!  It's amazing how a clean, shiny sink is contagious--it spreads its cleanliness to the kitchen counters, and then before you know it, your whole house is clean. :D


Step 8) If you still don’t like the way it looks, then you can try some car wax. Just know in your heart that you have cleaned it very well now, and it doesn’t have to be perfect. Our perfectionism is what got us in this situation in the first place!

Step 9) Every time you run water in your sink, take your clean dishtowel and dry it out (I lay out a clean one every night as part of my before-bed routine). Before you know it, you will be doing this every time you leave your kitchen! The rest of the family will, too. No more water spots. You will have a clean and shiny sink.

Step 10) Don’t have a fit if someone doesn’t take as much pride in your sink as you do. It is very easy to fix. You have already done the hard part; you will never have to go through this process again. Daily maintenance will keep it looking this way all the time. Nasty, hurtful words are not as easy to repair. Just be sure and tell your family what you are trying to do. They will think you have gone crazy.

Step 11) If you don’t have a dishwasher, don’t worry. A dishwasher is just a dirty dish disposal. Clean out a place under your sink and put a dishpan in there. Teach your family that instead of putting their dirty dishes and glasses in the sink, place them into the dish pan. Get into the habit of putting your dishes away as soon as they have been washed and are dry. No more leaving the dish-drying rack on the counter or in the sink. Put it away under the sink when you have finished. If your old one is nasty, you may want to soak it in the sink full of bleach water at the same time you soak the sink, or go buy a new set.

Step 12) To insure that your family remembers this, put a note in the sink. It will get their attention and remind them where to put the dishes. Be patient! They have never been taught, either. It is going to take some practice.

Now if you have a stainless steel sink, I recommend all of the above directions with one extra instruction added: after you soak your sink, rinse well, and use SOS pads to scrub it. This will buff the finish. It will look like new.  (S.O.S. Steel Wool Pads)
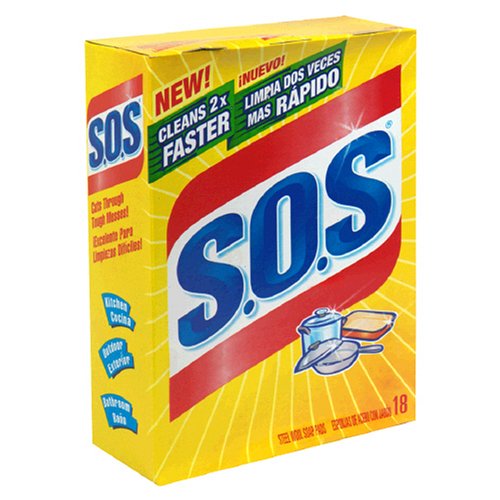


If you still can’t get it to shine after the Windex, put a light coat of lemon oil or olive oil on it. I mean just a tiny bit on a cloth and rub it. This will make you smile. Some people have had very good results from Bar Keepers Friend.

Go Shine Your Sink!
FlyLady

Last note: Be sure you don’t mix cleansers like Comet with Windex (or other ammonia based cleaners); you can create dangerous gases! It is worth repeating: rinse well between each step!


Tuesday, December 10, 2013

Confession | Flylady BabyStepping Day 2

Confession... I totally didn't shine my sink yesterday!  But in true FlyLady fashion I will not get discouraged and give up.  It IS getting done today. :)  Along with BabyStep Day 2 (it's an easy one)!  Want to see what I was tackling yesterday instead?  Okay, you asked for it...


Yup.  CHAOS.  It felt SO GOOD attacking all this and waking up today to a clean living room!  And now I feel like I can spend the time shining my sink when I have a much more peaceful view as I work. :)

Do you take pictures of your cluttered closets or messy rooms?  I love taking before and after shots.  They motivate me, and they're fun to show the husband when he gets home from work! :D  I'll share the "after" picture today, along with my shiny sink "before and after!"

Update later same day:

Here are the After pictures!


Today I wanted to share a few more cool things about FlyLady with you, and then you'll find BabyStep 2 at the bottom of the post.

1) One is that her daily emails include a Fly Kids Challenge to help us teach our little ones how to pick up after themselves as well.  I'm so excited to start doing this with Ellie!  You can sign up for her emails here (again, remember to do the "FlyLady Lite" option so you don't get 10 emails a day!).

Here's an example of today's Fly Kids Challenge:
Today we are going to do something that might be hard, but that is okay. You can do this! You are going to go look in your rooms for 11 toys that are either broken or missing pieces that need to be thrown away. Get a trash bag and toss them!

Things that you do not use because they are broken is clutter. Clutter is made up of the things that you have that you do not love or use. When you get the things that are broken, missing pieces out of
your room, there is less to pick up and clean. This gives us more time to PLAY!! YEAH!

2) The other thing I love is her Flying Through the Holidays Control Journal.  It's 25 pages to help you organize recipes, menus, gifts, calendar dates, travel plans, etc.  So helpful!!  Start a FlyLady folder on your computer and save this to it.  Another thing to copy and paste into a document to save is this Clutter Free Gift Ideas List for Preschoolers, School Aged Kids, Teenagers and College Kids.  Love the idea of asking grandparents for a membership to a zoo or for classes!

3) The last thing I wanted to note is how FlyLady breaks down different habits to focus on each month, or different zones in your house to focus on cleaning each week.  She includes missions for you to accomplish in her daily emails, or you can read about them on the launch pad.

December's Focus: Pampering yourself  "Take time for you! You are so worth it!"
This Week's Zone: Kitchen mainly--but can add Back porch/ Laundry room/ Pantry
Tuesday's Focus: Planning (meals, date night, prescription refills, family activities...) then Play!


And now for Day 2 of FlyLady's BabySteps... Getting dressed to your shoes!

If you're a stay-at-home mom you will especially appreciate this one.  This is one of FlyLady's habits that always stands out in my mind (even when I'm not consistently following FlyLady).  It consists of popping out of bed and getting yourself ready for the day FIRST thing.  And it really makes a big difference for me--because on my rare off days (where I don't have classes or anything else going on), my tendency is to lounge at home all day in my comfies and not leave unless my awesome friends call me up and get me out of the house. :)  Or--another confession--on a really lazy day I can even forget to brush my teeth (until the husband is on his way home and I quickly go brush haha!)

So getting dressed to my shoes is a huge help for me (when I actually do it!).  Something that motivates me is knowing that the day I don't "dress to shoes" will inevitably be the day that the mailman comes by with something for me to sign, or our apartment's maintenance has to stop in for something.

And for those of us with little ones--a trick that has worked for me is keeping a box of Cheerios and a snack cup in our bedroom to hold Ellie over.  I'll bring her milk cup in from the kitchen along with a banana, and then I'll pop a show on while I quickly wash my face, brush my teeth, and put in my contacts.  Or I can even hop in the shower since I can see Ellie on my bed from our bathroom.  Baby Signing Time has literally been a LIFESAVER for this morning time!!  And even though I can't hear from the shower, it's super fun to see what song is on by what Ellie is signing.  And I can even sign along with her so I'm still interacting with her!  It's also been awesome that Ellie can sign to me while I'm showering to tell or ask me something.  Just love it.. :)

Have you gotten "dressed to your shoes" today? (Note: remember that whenever saying this phrase, your hygiene routine, hair, and face is included in this.)  If not, it's not too late!


Here's what FlyLady says about today's BabyStep:

Beginner BabySteps: Day 2
Today I want you get up and get dressed to lace-up shoes when you first get up in the morning. This means fix your hair and face, too.

In order for us to change ourselves, we need to remind ourselves of what we are doing. I did this with yellow sticky notes throughout my home to guide me through my day. This was the beginning of my home control journal. I had little notes on my bathroom mirror to remind me to get dressed to shoes.

Shine your sink before you go to bed. (Remember that this just means that after doing dishes you'll make sure all the food and soap is rinsed out, sponge is wrung out, and sink is dried with a dish towel.)